
Recently our Ahimsa Media team has been setting up web monetization on our various digital magazines and blogs, all built on WordPress.org sites, utilizing the web monetization standard*. At present the main and only Web Monetization Provider is Coil. To make monetizing your WordPress.org sites easy, eliminating the need to code for this yourself, Coil has created a Web Monetization WordPress plugin. In this post, I walk you through the steps in setting up the Coil Web Monetization plugin for WordPress, including troubleshooting of some common set up issues.
*Note: This is different than the ‘web monetization’ of the past, in which we think of advertising, sponsorship, and affiliate links. That is a story for another day though, in which I will get into explaining what it is in greater depth. We will also be building an open educational course on the web monetization standard on StoryToGo.
Open a Coil Account
- Visit coil.com/creator and click on the black ‘Start monetizing. It’s free!’ button.
- Sign up for a free creator account.
- Follow the directions below to create a Payment Pointer.
- Add your Payment Pointer to your Payout Wallet, under Payouts in your Coil Settings.
Consider purchasing a Coil membership. If you are benefiting with earnings from Coil members visiting your site, it is nice to share the love by purchasing a Coil membership yourself and supporting other creators. As I write this, Coil memberships are $5 US / month.
Create a Payment Pointer
In order to monetize your digital content with Coil, you need a digital wallet provider. Through that digital wallet, you set up a payment pointer. This is basically an ID for a payment account to send your earnings from Coil to. For more details on Payment Pointers, read this Payment Pointer Overview on Coil’s Support site.
Coil shares details on how to set up a payment pointer on GateHub and Uphold. You just need one of these, not both, so take your pick. Here’s what you need to do …
Create a GateHub Payment Pointer
- Sign up for or into your GateHub account.
- Select your Interledger wallet by clicking on the wallet drop-down arrow in the upper-left to select it.
- Click Add Funds.
- Select the Interledger Payment pointer, then copy your payment pointer.
Create an Uphold Payment Pointer

- Sign up for or into your Uphold account.
- Click on the transact button – in the side navigation bar on your desktop or bottom navigation button in the app.
- Under Anything to Anything, click on the From menu and scroll down and click on Interledger.
- On the To menu, scroll down to select your preferred currency and account.
- Copy the payment pointer and click Done.
Add Payment Pointer in Coil
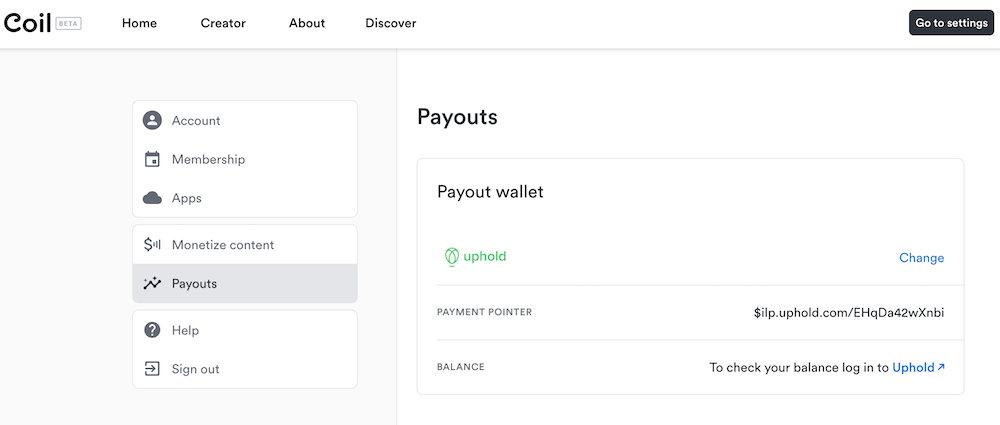
- Go to your Settings.
- Select Payouts.
- Add your payment pointer.
Set Up the Coil Web Monetization Plugin on your WordPress.org Site
- Login to your WordPress.org site’s administrative dashboard.
- Hover your cursor over Plugins in the side navigation bar and click on Add New.
- In the Search Bar, look up Coil Web Monetization.
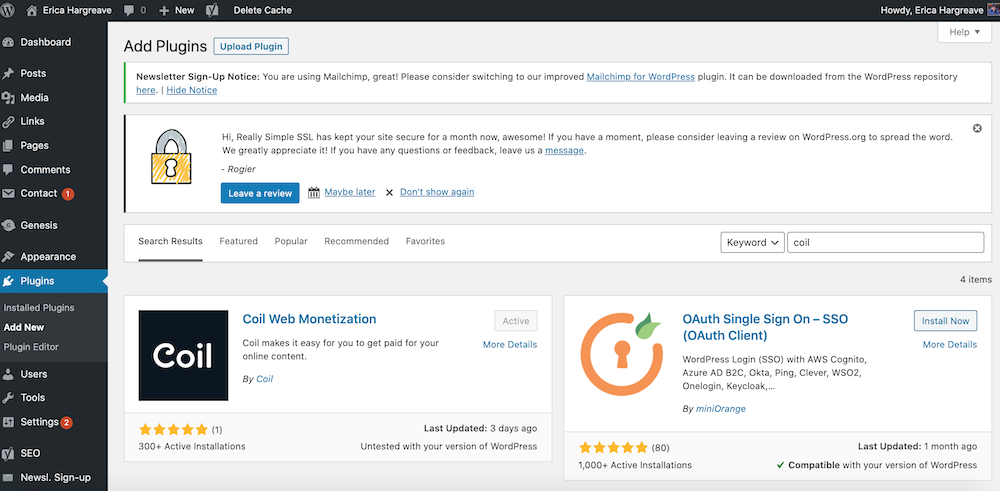
- Click Install Now.
- Activate the Coil Web Monetization plugin.
- In the side navigation bar of your administrative dashboard, click on Coil.
- Click on Global Settings in the header navigation menu.
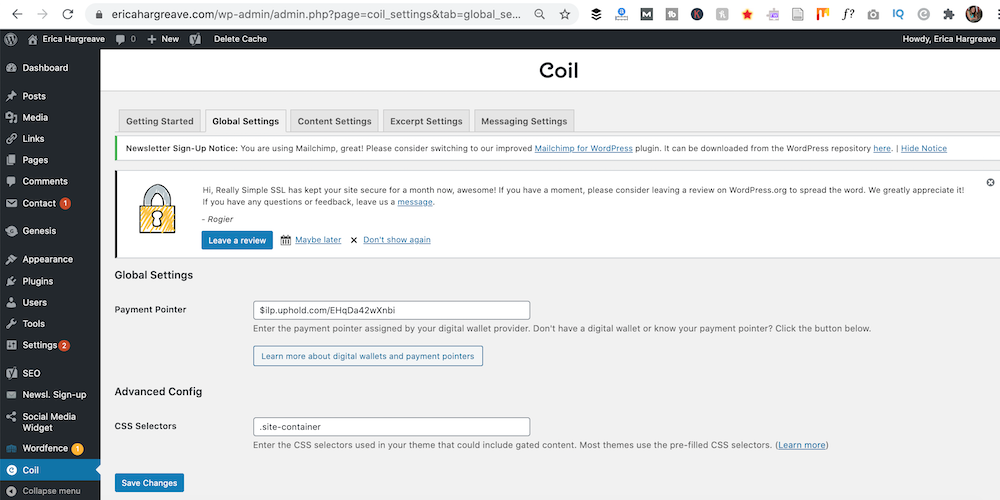
- Add your payment pointer and click Save Changes.
- Click on Content Settings in the header navigation menu.
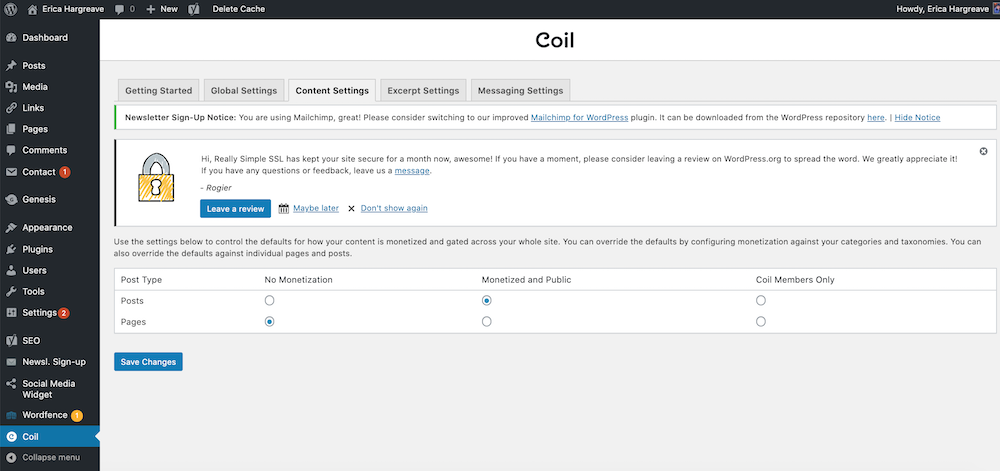
- Select your default monetization settings. You will also be able to tailor these on the dashboard for individual posts and pages. Click Save Changes.
- Click on Excerpt Settings in the header navigation menu.
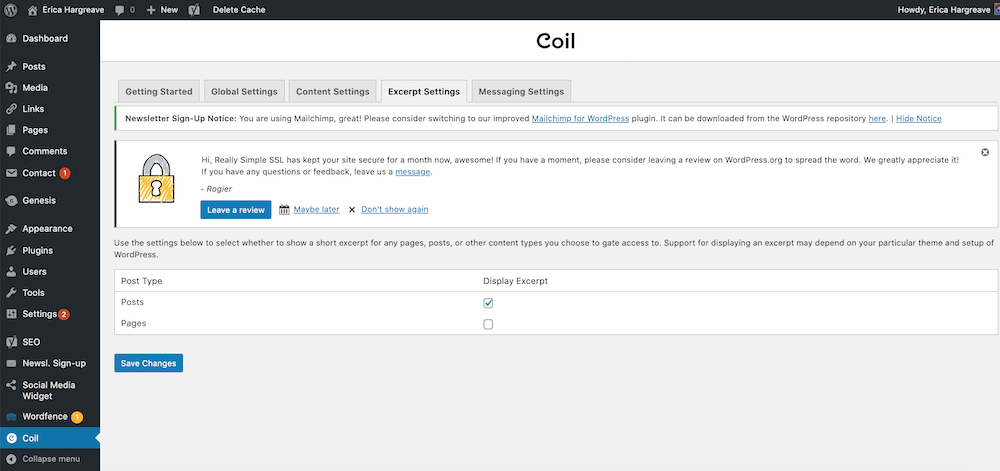
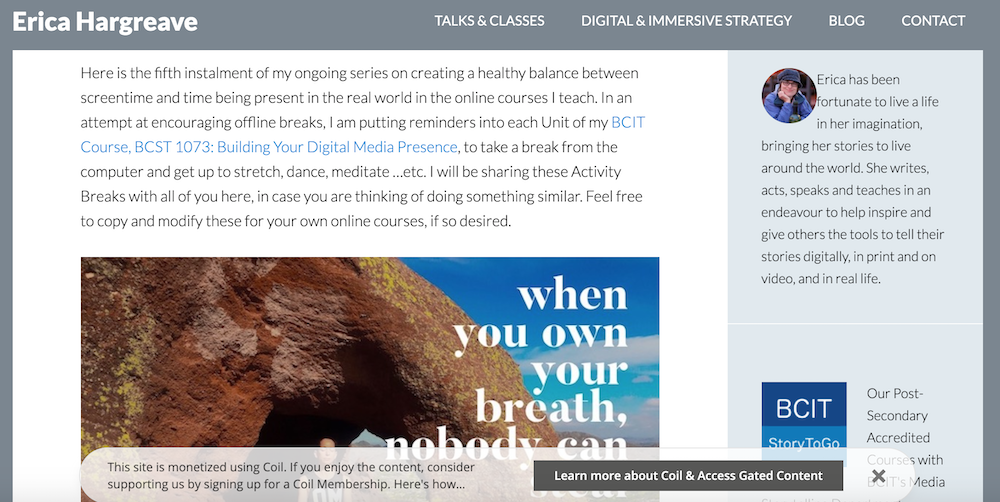
- Choose whether you wish an excerpt to show on your posts and / or pages, explaining that the site is monetized with Coil. See below for a sample of how the excerpt will display. Click Save Changes.
- Finally, click on Message Settings in the header navigation menu.
- Once there, click on Edit messages. That will take you to Coil Web Monetization area in the Theme Customization menu.
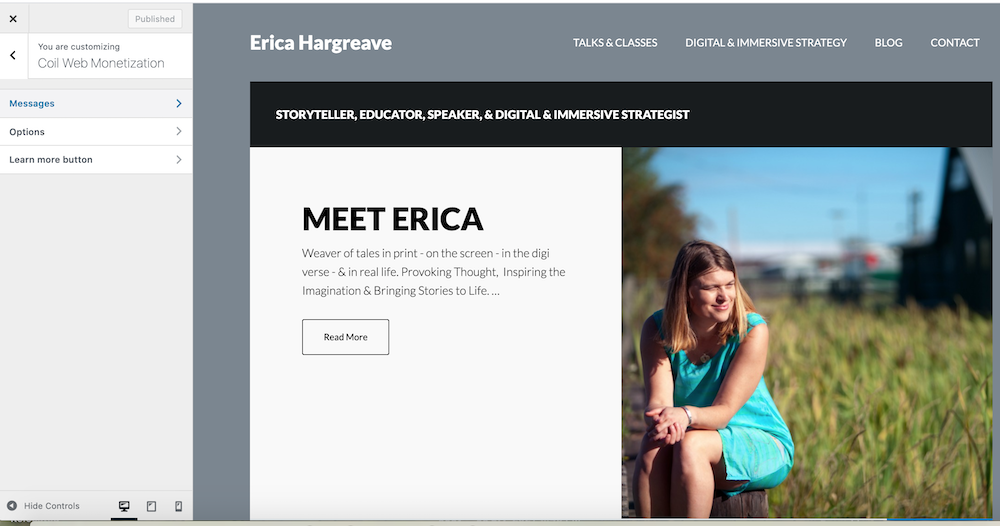
- Click on Messages, and scroll through the excerpt messages, changing those that you wish. Then click Publish.
- Next review your Option settings, and if you make changes click Publish.
- Finally review the text on the Learn More Button. If you make changes, click Publish.
- Once all of that is done, check your live website to make sure everything is working and displaying as desired. To check and see if the monetization is working, you need a Coil membership and the Coil browser extension. If you see the black Coil logo with a green dollar sign beside it in the browser extension, when visiting a monetized page on your site, then you site is properly monetized.

Usually, if something is not working with the plugin, it is with displaying the excerpts. If that’s the case, then continue on to the Troubleshooting section of this post, below.
Troubleshooting Set Up Issues
As of writing this, there have been two common issues in setting up the Coil Web Monetization plugin for WordPress. Both pertain to getting the excerpts to display. I will start with the easier of the two fixes.
Fix #1
- On your WordPress.org site’s administrative dashboard, in the side navigation bar, hover your cursor over Appearance and click on Customize.
- Click on Coil Web Monetization and then Options.
- Check OFF on ‘Show a donation bar on posts that are monetized and public’.
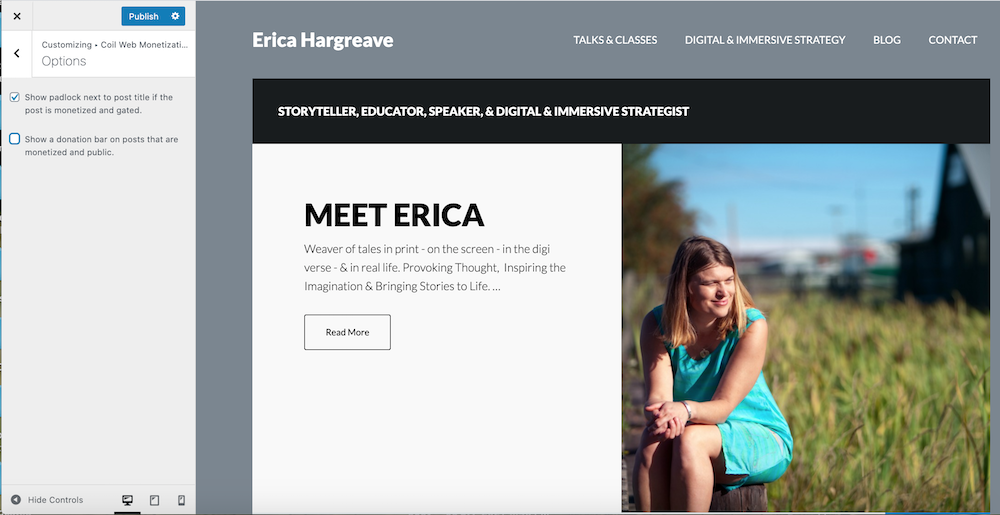
- Click Publish.
- Check ON on ‘Show a donation bar on posts that are monetized and public’.
- Click Publish.
- Check your live site to see if the Coil excerpts are now displaying.
Fix #2
If Fix #1 did not work, then your issues may be that you have the wrong CSS Selector under your Global Settings in the Coil Web Monetization plugin set up. Below is a chart with the CSS Selector for a few WordPress themes.
| Theme | Content Area CSS Selectors |
|---|---|
| StudioPress Genesis Themes | .site-container |
| Astra | .content-area .entry-content (plugin default) |
| Colibri WP (modern theme) | .colibri-post-content |
| GeneratePress | .content-area .entry-content (plugin default) |
| Hello Elementor | .site-main .page-content |
| Hestia | article .entry-content |
| Neve | article .entry-content |
| OceanWP | .content-area .entry-content (plugin default) |
| Primer | .content-area .entry-content (plugin default) |
| Shapely | article .entry-content |
| Twenty Fifteen | .content-area article |
| Twenty Nineteen | .content-area .entry-content (plugin default) |
| Twenty Seventeen | .content-area .entry-content (plugin default) |
| Twenty Sixteen | .content-area .entry-content (plugin default) |
| Twenty Twenty | article .entry-content |
| Uptown Style | .content-area .entry-content (plugin default) |
In testing the above CSS Selectors:
- In the side navigation bar of your administrative dashboard, click on Coil.
- Click on Global Settings in the header navigation menu.
- Paste in the suspected CSS Selector and click Save Changes.
- Check your live site to see if the Coil excerpts are now displaying.
- If not, repeat Fix #1 and recheck live site.
- If excerpts are still not displaying on live site, repeat Fix #2 and Fix #1 with different CSS Selectors, until you find the correct one for your theme.
If none of the above CSS Selectors work, then inspect your theme’s stylesheet to find the correct content area selectors. Here is Coil’s explanation of how to do this:
- Right-click on a page/post that is displaying / hiding the excerpt incorrectly.
- Select Inspect (Chrome) or Inspect Element (Firefox).
- Look through the
<body>for a<main>element. You might have to drill-down quite a bit when looking through the stylesheet. If found, copy theidvalue and/orclassvalue. For example, in<main class="site-main">, you’d copysite-main. - Look for an article element (
<article ...>). Note if found. - Locate the
div classfor the content area (for example,<div class="page-content">). Copy the class value. - In the Coil plugin settings, go to Global Settings > Advanced Config.
- Replace the values in the CSS Selectors field with what you’ve found. If you found
article, include that as well. For example, a stylesheet containing:<main class="site-main"> ... <div class="page-content">Means the following should be placed in the CSS Selector field:.site-main .page-content
If none of the above fixes work, or you are encountering a different issue, then check the Coil plugin support forum to see if anyone else has had this issue and there is a published fix. If not, email Coil directly (info[at]coil.com) and / ask if anyone has found a solution for the issue in the Web Monetization forum.
If you encounter another issue and fix with the Coil plugin, and want to share the fix in the comments below, I will update this post with your fix, crediting and linking back to you.


[…] and set up a payment pointer with a digital wallet. I explain how to do that in this post on the Coil Web Monetization Plugin for WordPress – Set Up and Troubleshooting Issues. You might also want to consider signing up for a $5 US / month subscription with Coil to give back […]