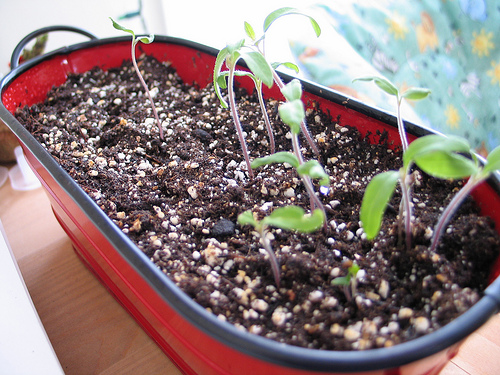
As is tradition at Ahimsa Media, we take a few moments over the winter holidays to write up an activity for you, our wonderful community, to unwind over the holidays. This year, as News Year’s Eve has past and much of Canada is covered in a wintery wonderland, I for one am craving fresh vegetables, so I thought I’d share some fun ideas (for all ages) for turning your vegetable scraps into a kitchen garden.
These are really very simple, allowing you to dig in the dirt in the winter (which I dearly love) and reuse your vegetable scraps, creating something green and growing in the kitchen.
Before getting started, gather the following:
- potting soil
- small pots or clean plastic containers (with drainage holes poked in the bottom)
- plates or plastic lids (to sit under the plastic containers, once potted, for drainage)
- clear glasses or jars
Avocado Pits
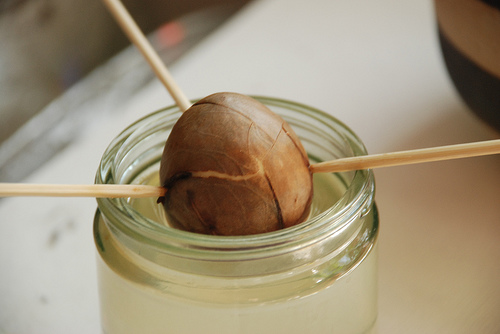
The pit of an avocado is, of course, it’s seed, and as such you can grow an avocado tree from it. Here is how to get it sprouting …
You’ll need:
- an avocado
- a clear glass or jar
- water
- sturdy toothpicks
Simply,
- Cut open the avocado (make something scrumptious with the flesh inside) and remove the pit.
- Skewer the pit near the top (pointed side) with 3 or 4 toothpicks (like shown in the picture above) so that the toothpicks will act as a bridge over a glass of water.
- Fill the glass with water.
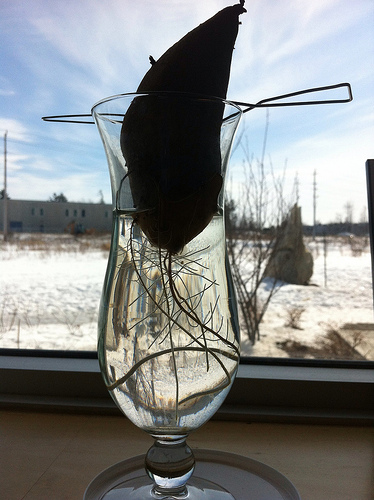
- Suspend the pit with the toothpicks over the glass of water (pointy side up), so that 2/3 of the pit is covered by water.
- Now patiently wait, making sure the water levels stay up. If you are successful, you should see the beginnings of roots in 3- 4 weeks.
- After 2 weeks, you can gently peel off the outer skin of the avocado pit to speed up the process.
- Eventually when you have a sturdy root and stem, you can transplant your avocado tree into a pot.
With a lot of loving care and a little luck, hopefully a few years down the road, you just might be able to show up at a party carrying your very own homegrown guacamole.
Sweet Potatoes
Technically, this one doesn’t use leftover vegetable scraps, but rather a full sweet potato. I’ve decided to overlook that detail for the simple reason that I love sweet potatoes.
You’ll need:
- a sweet potato tuber
- a clear glass or jar
- water
- sturdy toothpicks
Simply,
- Place the tuber in a jar of water, pointy end down. You can place it suspended on the jar with toothpicks, or just as is.
- Wait a few days for the shoots (or slips as they are called) to appear.
- Once the slips are about 4 or 5 inches long, pull them off of the tuber and place them in another little jar of water. Wait for a few more days, and little roots will appear.
Congratulations! Your sweet potatoes are ready to plant!
Carrot Tops
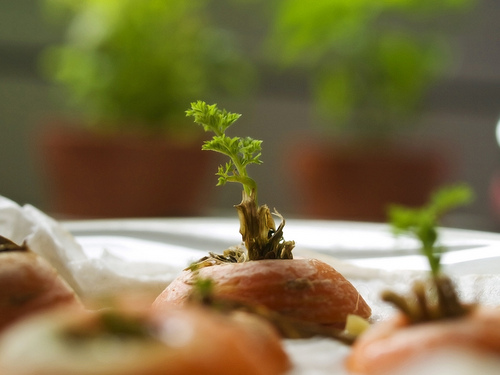
One of the cool things about carrots and parsnips is that you can replant the tops after chopping a carrot or parsnip up, provided you leave a bit of the tuber attached. In fact, if you look closely at a carrot or parsnip, you’ll see it has tiny hair-like structures growing on the tuber. These are roots and the reason why this works!
You’ll need:
- carrots (or parsnips) with their tops on
- mid-sized, clean plastic containers (with drainage holes poked in the bottom)
- plastic lids (to sit under the plastic containers, once potted, for drainage)
Simply,
- Cut the carrot, leaving an inch or two of the tuber at the base of the stem.
- Place the carrot in a pot of soil, covering the tuber with soil, while leaving the green stem exposed.
- Place in a sunny window, water regularly and transplant into a bigger pot, as necessary, as it grows.
*Apparently this works with pineapples too. I haven’t had any luck with this yet with a pineapple, but I know people that have.*
Roots on Your Veggies?
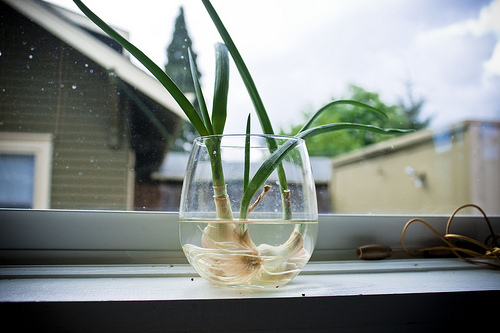
Many of the vegetables we purchase, have live roots on them. Just think about the leeks and green onions you buy. If replanted, these will grow.
You’ll need:
- vegetables with live roots (green onions, leeks, lettuce …)
- clear glass, jar or dish (in the case of the lettuce)
- water
Simply,
- Place your cut vegetable (leaving about an inch of the vegetable attached to the roots) in a glass of water, roots down.
- Top up the water as needed.
Before long you’ll have the beginnings of what appears to be new plants. Either chop it up for a meal or plant them, as desired.
It’s Sprouting!!!
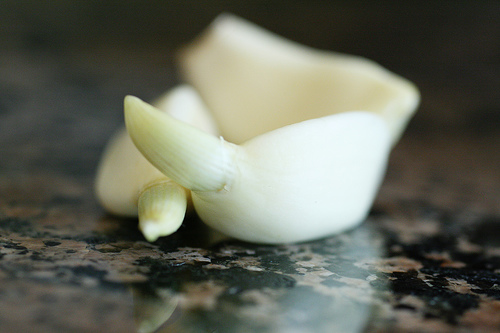
If you’re like me, then from time to time you’ll discover something sprouting in your vegetable drawer, like cloves of garlic and potatoes. Rather then composting them, why not plant them.
You’ll need:
- sprouting vegetables (like cloves of garlic or potatoes)
- clean plastic containers (with drainage holes poked in the bottom)
- potting soil
- plastic lids (to sit under the plastic containers, once potted, for drainage)
Simply,
- Place the sprouting vegetables in a pot of soil, covering it with soil, while leaving the green stem / leaves exposed.
- Place in a sunny window, water it regularly and transplant into a bigger pot, as necessary, as it grows.
Collecting Seeds
Don’t forget those seeds in your fruit are the beginnings of new plants. Why not save them and try to germinate them in some soil.
You’ll need:
- seeds from fruits
- clean plastic containers (with drainage holes poked in the bottom)
- potting soil
- plastic lids (to sit under the plastic containers, once potted, for drainage)
Simply,
- Fill a small pot with soil.
- Bury fruit seeds shallowly beneath the soil
- Place in a sunny window, water and transplant into a bigger pot, as necessary, as it grows.
Have fun planting and eating!
You can also catch up with some fun winter treats for your feathery neighbours with this post we did on Holiday Decorations for the Birds for one of our clients.
Enjoy the rest of your holidays!
Happy New Year!
~ from the gang at Ahimsa Media

Thanks for all those super ideas. I never would have thought that a carrot top or a sprouting garlic clove would turn into something new.
Cheers for the year,
Jacqueline
Thank you for using an image of mine in your post!
I am have more avocado seeds sprouting, and your post gave me some good ideas for other vegetable sprouts.
Thank you.